Table of Contents
A backyard transformation takes an underused lawn and turns it into functional outdoor living space. On Long Island, where summers are warm and property values are high, a well-designed backyard is both a lifestyle upgrade and a sound financial investment. This guide covers everything you need to know to plan, budget, and build a backyard that works for your family and adds lasting value to your home.
Planning Your Vision
The most successful backyard transformations start with a clear vision and a realistic understanding of your property's possibilities. Before you look at materials or call contractors, spend time thinking through these questions.
Define How You Will Use the Space
Think about how your family actually spends time outdoors. Do you host large gatherings or prefer small family dinners? Do you want a quiet retreat or an entertainment hub? Do your kids need play space? Will you be cooking outdoors regularly, or is a simple grill sufficient? Your answers will shape everything from the patio size to the features you include.
Assess Your Property
Walk your backyard with a critical eye. Note the grade and slope, sun and shade patterns throughout the day, existing trees and landscaping you want to preserve, views you want to frame or screen, and the proximity to neighbors. On Long Island, lot sizes vary significantly. A 60-by-100-foot lot in Levittown presents different opportunities than a half-acre property in Smithtown or a waterfront lot in Bayville. Work with what you have rather than fighting your site.
Set Priorities
Most homeowners have a longer wish list than their budget allows. Rank your features in order of importance. A common priority list looks like this: patio first, then fire pit, then walkways, then outdoor kitchen, then lighting. This helps you make smart decisions if you need to cut scope or phase the project over time.
Popular Backyard Features
Here are the most popular features Long Island homeowners include in their backyard transformations, along with realistic cost ranges.
Paver Patios
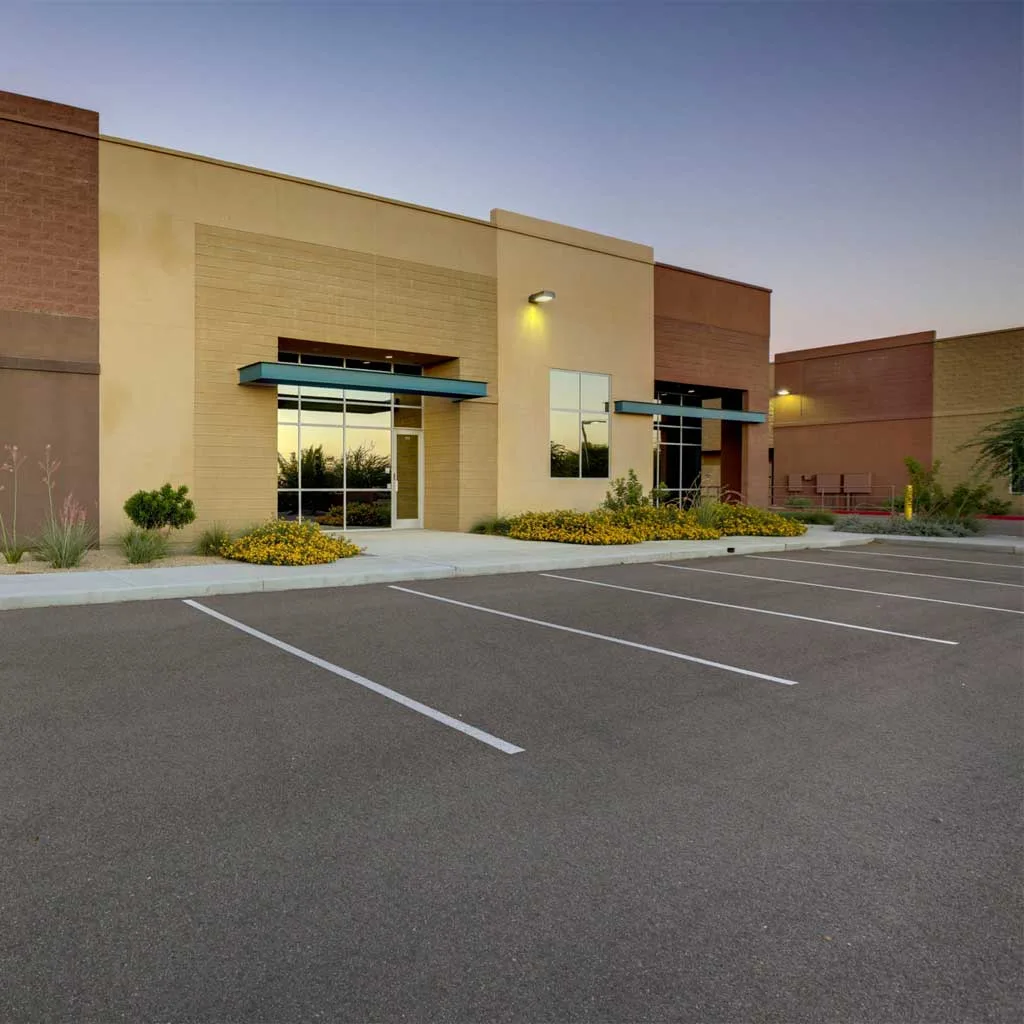
The patio is the foundation of any backyard transformation. It defines the primary living area and serves as the base for most other features. On Long Island, concrete pavers from Cambridge, Nicolock, or Techo-Bloc are the most popular choice for their durability, design options, and freeze-thaw resistance. Expect to pay $20 to $35 per square foot installed depending on the tier (Classic, Signature, or Premium). A 400 square foot patio using mid-range Cambridge pavers typically runs $10,000 to $12,000. Read our complete patio installation guide for in-depth information.
Outdoor Kitchens
Outdoor kitchens have become one of the most requested features in Long Island backyard projects. A basic grill island with a built-in grill and counter space starts around $5,000 to $10,000. A full outdoor kitchen with a grill, side burner, refrigerator, sink, and bar seating runs $15,000 to $40,000 or more depending on appliance selections and the size of the structure. Popular grill brands include Lynx, Bull, Blaze, and Delta Heat. The island structure is typically built from concrete block and veneered with matching paver or natural stone. Gas and electrical connections require licensed tradespeople. See our outdoor kitchen installation services.
Fire Features
Fire pits and outdoor fireplaces extend your backyard season from early spring through late fall. A built-in wood-burning fire pit using matching wall blocks costs $2,500 to $5,000. Gas fire pits with electronic ignition run $4,000 to $8,000 including the gas line. Outdoor fireplaces are a bigger investment at $8,000 to $15,000, but they create an architectural focal point and provide wind-protected warmth. Cambridge and Nicolock both offer fire pit kits that integrate with their paver and wall systems.
Pool Hardscape
If you have a pool or are planning to install one, the surrounding hardscape is critical to both safety and aesthetics. Paver pool decks provide a slip-resistant, cool-underfoot surface that drains well. Cambridge and Nicolock offer pool coping units that create a finished edge along the pool. Popular pool deck materials include tumbled pavers, which hide wear and provide good traction, and porcelain pavers, which stay cooler in direct sun. Pool hardscape typically costs $20 to $35 per square foot installed, ranging from Classic Cambridge or Nicolock pavers to Premium natural stone or porcelain options. Learn more about our pool hardscape services.
Retaining Walls
Retaining walls serve both functional and aesthetic purposes. They create level areas on sloped properties, define garden beds, and add vertical interest to the landscape. On Long Island, retaining walls are commonly built from segmental wall blocks (Cambridge Maytrx, Nicolock Colonial, or Techo-Bloc Mini-Creta) or natural stone. Costs range from $40 to $80 per square face foot for block walls and $60 to $120 per square face foot for natural stone. Walls over 4 feet tall require engineering and permits in most Long Island towns. See our retaining wall installation page.
Walkways and Pathways
Paver walkways connect your patio to the house, pool, garden, and other backyard features. They provide clean, mud-free paths and tie the entire design together visually. Walkways typically cost $20 to $35 per square foot installed and range from 3 to 5 feet wide. Using the same paver family as your patio creates a cohesive look. Visit our walkway installation page for more details.
Design Trends for Long Island Backyards
Backyard design trends evolve, but on Long Island, the best designs balance current style with timeless appeal. Here is what we are seeing in 2025 and 2026.
- Large-format pavers. Oversized paver slabs (24 by 24 inches and larger) create a sleek, modern look with fewer joints. Techo-Bloc Blu 60 and Cambridge XL are the most popular options. This trend is especially strong in newer construction in areas like Melville, Dix Hills, and Jericho.
- Mixed materials. Combining concrete pavers with natural stone accents, wood elements, and metal details creates visual interest. A concrete paver patio with a bluestone border or natural stone fire pit surround is a common and effective combination.
- Outdoor rooms. Rather than one large patio, the trend is toward distinct zones: a dining area, a lounging area, a cooking zone, and a fire area. Low walls, level changes, and different paver patterns help define each space.
- Gray and charcoal color palettes. While warm earth tones remain popular, gray-toned pavers and cool color blends are gaining ground, especially paired with contemporary home exteriors.
- Low-maintenance landscaping. Homeowners are moving away from high-maintenance lawns and toward native plantings, ornamental grasses, and landscape beds with mulch and stone. This reduces upkeep and complements hardscape features.
- Integrated lighting. Built-in LED lighting in walls, steps, and along walkways is now standard in higher-end projects. It extends usability, improves safety, and adds ambiance.
Ready to Transform Your Backyard?
We offer free on-site consultations to help you plan your project from concept to completion.
Get Your Free EstimateBudget Planning and Phasing
A backyard transformation is a significant investment. Smart budget planning ensures you get the most value without overextending yourself.
Budget Ranges by Project Scope
| Project Scope | Typical Features | Cost Range |
|---|---|---|
| Basic | 300 sq ft patio, simple walkway | $10,000 to $20,000 |
| Mid-Range | 400 to 500 sq ft patio, fire pit, seating wall, walkway | $30,000 to $60,000 |
| High-End | Large patio, outdoor kitchen, fire feature, retaining walls, lighting | $60,000 to $100,000 |
| Premium | Multi-zone patio, full kitchen, pool hardscape, walls, lighting, landscaping | $100,000 to $150,000+ |
Phasing Your Project
If your dream backyard exceeds your current budget, phasing is a practical approach. The key is to plan the entire layout before building anything so each phase connects properly. Here is a typical phasing strategy:
- Phase 1 (Year 1): Patio, main walkway, and basic grading. This creates the core usable space. Run conduit for future electrical and stub out gas lines if an outdoor kitchen is planned later.
- Phase 2 (Year 2): Fire pit, seating walls, and any retaining walls needed for grade changes. These add functionality and define the space.
- Phase 3 (Year 3): Outdoor kitchen, additional walkways, landscape lighting, and plantings. These are the finishing touches that complete the vision.
Phasing Tip
Even if you are phasing the build, invest in a complete design from the start. This ensures proper drainage, utility routing, and visual cohesion between phases. It also prevents costly rework. A good contractor will create a master plan and help you prioritize which features to build first.
We offer financing options to help make larger projects more accessible. Ask about monthly payment plans during your consultation.
The Backyard Transformation Process
A backyard transformation involves multiple trades and careful sequencing. Here is how a typical project unfolds when working with Brothers Paving & Masonry.
Consultation and Design
We visit your property, walk the space with you, discuss your vision and budget, and take measurements. We then develop a design layout with material recommendations and a detailed cost estimate. For complex projects, we may provide a scaled drawing or 3D visualization.
Permitting and Utility Marking
We pull any required permits and schedule 811 utility markings to identify underground gas, electric, cable, and water lines. This step is critical for safety and avoids costly surprises during excavation.
Site Preparation and Grading
We clear the work area, remove sod or existing materials, and grade the site to establish proper drainage slopes. For sloped properties, this may include cutting into hillsides and building retaining walls to create level areas.
Underground Utilities
If the project includes an outdoor kitchen, lighting, or gas fire features, we install underground conduit, gas lines, and water supply lines before any hardscape goes in. Running these during site prep is far less expensive than retrofitting later.
Base Construction
We install the compacted gravel base for patios, walkways, and other hardscape areas. This is the foundation of the entire project. We use crushed concrete or processed gravel, installed in lifts and mechanically compacted for maximum stability.
Hardscape Installation
Pavers, walls, steps, fire pit structures, and outdoor kitchen islands are built. We start with the lowest elements and work up. Paver installation includes bedding sand, paver placement, edge restraints, and polymeric joint sand.
Finishing Trades
Licensed electricians connect lighting and kitchen electrical. Licensed plumbers connect gas lines and water supply. Appliances are installed and tested. This work is coordinated by our team so you do not have to manage multiple contractors.
Landscaping and Cleanup
We restore all disturbed lawn areas, install any planned plantings and landscape beds, lay mulch, and do a thorough site cleanup. A final walkthrough ensures everything meets your expectations.
Learn more about our backyard transformation services.
ROI and Home Value Impact
On Long Island, where home prices and property values are among the highest in the country, outdoor living improvements deliver strong returns. Here is what the data shows.
Expected Returns by Feature
| Feature | Typical Cost | Estimated ROI |
|---|---|---|
| Paver patio | $10,000 to $25,000 | 60% to 80% |
| Outdoor kitchen | $10,000 to $40,000 | 55% to 75% |
| Fire pit / fireplace | $2,500 to $15,000 | 50% to 70% |
| Pool hardscape upgrade | $10,000 to $30,000 | 50% to 70% |
| Professional landscaping | $5,000 to $15,000 | 100% to 150% |
Beyond the direct financial return, a well-designed backyard makes your home more attractive to buyers and can reduce time on the market. In competitive Long Island markets like Massapequa, Syosset, and East Northport, outdoor living space is increasingly viewed as a standard expectation rather than a luxury feature.
Keep in mind that ROI is highest when the work is done professionally with quality materials. DIY hardscape work or bargain-bin materials can actually hurt resale value if the quality is visibly poor.
Permits and HOA Considerations
Understanding permit requirements before you start avoids costly delays and potential fines. Here is what Long Island homeowners need to know.
What Typically Requires a Permit
- Retaining walls over 4 feet tall require a building permit and often a structural engineering plan in all Long Island towns.
- Outdoor kitchens with gas require a plumbing permit for the gas line connection. Electrical connections also require a separate electrical permit.
- Attached structures like pergolas or covered patios connected to your house typically need a building permit.
- Pools require building, electrical, and fencing permits.
- Fences require a permit in most Long Island towns, with specific height and setback requirements.
What Typically Does Not Require a Permit
- Ground-level patios (no raised deck or structure)
- Walkways and pathways
- Retaining walls under 4 feet
- Freestanding fire pits (wood-burning, no gas connection)
- Freestanding pergolas not attached to the house (check your specific town)
- Low-voltage landscape lighting
HOA Considerations
If your property is in a community with a homeowners association, check the HOA bylaws before beginning any work. Many Long Island HOAs, particularly in planned communities in areas like Commack, East Islip, and Hauppauge, have rules about fence heights, structure placement, material colors, and even landscaping choices. Getting HOA approval before starting avoids potential disputes and forced modifications.
At Brothers Paving & Masonry, we handle permitting as part of every project and can advise you on any HOA requirements that may affect your plans.
Seasonal Planning on Long Island
Timing your backyard transformation correctly helps you avoid delays and get the most enjoyment from your new space.
The Ideal Timeline
- January to February: Start gathering ideas, researching contractors, and requesting consultations. This is the best time to lock in scheduling for a spring start.
- March to April: Finalize your design, sign your contract, and pull permits. Materials are ordered. Site work can begin once the ground has thawed and dried.
- May to June: Peak construction window. The ground is workable, the weather is cooperative, and most projects can be completed in time for summer enjoyment.
- July to August: Construction is still possible but contractors are at peak capacity. Starting a large project in midsummer may push completion into fall.
- September to October: Good weather for hardscape work. A smaller project started in September can be done before cold weather arrives. Larger projects may carry into November.
- November to December: Most hardscape work slows down. This is a good time to plan and budget for a spring start.
Planning Ahead
The most common regret we hear from homeowners is that they did not start the planning process sooner. By the time they contact a contractor in May or June, the schedule is already full and their project gets pushed to late summer or fall. If you want your backyard ready for summer entertaining, begin the conversation in January.
Start Planning Your Backyard Transformation
Our team will visit your property, discuss your vision, and help you create a plan that fits your budget.
Choosing Your Contractor
A backyard transformation is a complex project that involves excavation, grading, drainage, hardscape, masonry, and potentially electrical and plumbing work. Choosing the right contractor is the single most important decision you will make.
- Look for a full-service contractor. A company that handles paving, masonry, drainage, and project management in-house delivers better results than cobbling together separate trades. One team, one vision, one point of accountability.
- Review their portfolio carefully. Ask to see completed backyard transformation projects similar in scope to yours. Photos from multiple angles and before-and-after shots tell the real story. Better yet, ask if you can visit a completed project.
- Confirm insurance and licensing. General liability, workers' compensation, and any required trade licenses for electrical and plumbing work. Do not skip this step.
- Evaluate communication. During the estimate process, pay attention to how responsive and clear the contractor is. A contractor who is hard to reach before the project starts will not improve once work begins.
- Get everything in writing. The contract should include a detailed scope of work, material specifications, project timeline, payment schedule, change order process, and warranty terms.
Brothers Paving & Masonry has been transforming Long Island backyards for over 15 years. We handle every aspect of the project from design through completion, and we back our work with a 5-year craftsmanship warranty. Our Google rating is 5 stars across 70 reviews.